

Get ready for a FUN blog hop. I've teamed up with some amazing bloggers to bring you a ton of activities, crafts, and ideas to keep your kiddos busy, as buzzing bees, this summer!

I am such a fan of puppets. My mom is a puppeteer and I grew up surrounded by homemade puppets of all sorts. I helped her with her business "Puppets-To-Go" when I was little. We did birthday parties for kids, complete with puppet shows, crafts, and fun.
When this blog hop came up, I knew exactly what I wanted to make. PUPPETS! I gathered my kids, supplies (and my mom) and got to work.
We have been reading fairy tales and fractured fairy tales. Two of our favorite fractured fairy tales are: "The Three Little Pigs and the Somewhat Bad Wolf", by Mark Teague.

And "The Three Little Fish And The Big Bad Shark", by Will Grace and Ken Geist.

These two books have been read and reread in my house. My son will read them to my daughter and then I hear my daughter (4 years old) "reading" them to herself in her room. Priceless!
We used these two books as the inspiration for our puppets. We have two very different kinds of puppets for you today and both are very easy.
We will start with the three little pigs and the somewhat bad wolf. First, you need to assemble your supplies. You need:
- Pool Noodles in 2 colors
- Foam for the pig's noses, ears, and for the wolf
- Foam paint brushes that fit inside the puppets for the stick
- X-Large google eyes
- Elmer's Glue for pigs
- Marker to embellish the pig's ears and nose
- Popsicle stick's to make the puppet stand
- Hot glue for wolf and puppet stand
Here is the completed set of the three little pigs and the wolf. The pigs were completed by a 4 and 7 year old. I had to create the wolf, because he needed hot glue.

First thing that we did was cut the pool noodles into chunks for the puppets. We used scissors. A bread knife gives you a cleaner cut, but I wanted the kids to be able to create the whole puppet independently. We made sure to make the pig's bodies smaller than the wolf.

With my 4 year old, she cut part way through the noodle and then we split it apart together. It was a messier cut, but she got to do it "herself"!


Can you tell we are having fun???


 Use scissors to cut two slits in the top of the pool noodle. These will be for the ears.
 Add a sliver of glue in the space and insert the ears.
 Here is a completed pig.


I cut out the ears and nose out of foam for my daughter. I had my son trace and cut out his own.

The kids were able to draw nostrils on the big oval to make the nose, little triangles on the ears, and embellish the pig in any other way they wanted. My son added a mouth. Then, they used Elmer's glue to glue the eyes and nose on the pig.


The final part of this craft is to add a stick to the stick puppet. I found the easiest stick possible. Get the really cheap, small foam paint brushes.

Not sure how to word this, but all you need to do is push the foam paint brush into the bottom of the pig. The foam grabs hold of the noodle and it makes a perfect stick puppet.

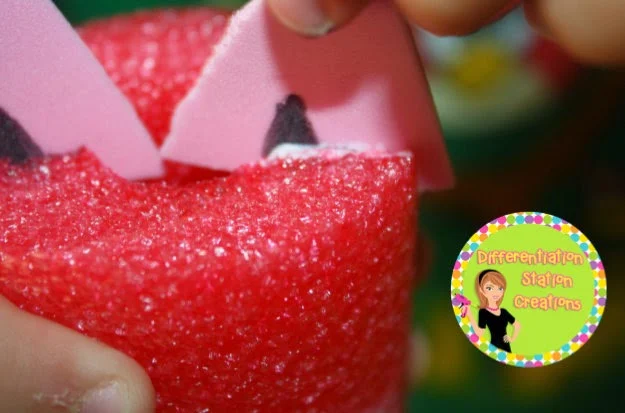
I created the wolf puppet, because it is a little more difficult and requires hot glue. Cut two sets of circles for the eyes. I used Elmer's glue to glue these to the wolf. Cut out some angry looking eyebrows and use Elmer's glue.

To create the nose and teeth, you need hot glue. I attempted this with Elmer's glue, but it was not strong enough. I cut different sized-teeth for the mouth and layered them to make a toothy grin. Glue the teeth to the back of the nose.

I had to hot glue the nose and teeth to the noodle, because it was a little heavy for Elmer's glue.

Make yourself a debonair/sneaky mustache and attach it to the nose. Insert the foam paint brush and you are done!

To create you puppet stand, you just need a pool noodle cut in half and three popsicle sticks.
Cut an 18" section of the pool noodle. Then, make a horizontal cut the length of the 18". You should now have two identical halves. Hot glue large popsicle sticks to the bottom of one of the pool noodles. This will help the stand stay sturdy. You can add more than 3 sticks, if needed.
The puppets are inserted in holes on the top of the stand. I used a razor blade to start the holes. You are done!

Now for the fish puppets! You need to gather your materials.
- Old socks
- Cotton balls
- Google eyes
- Glue
- Markers ( I like Mr. Sketch)
- Clothespins
- Any optional embellishments (glitter, sequins, etc.)
Here is one of the completed fish.

Give kids an old sock (clean), a stack of cotton balls, and a clothespin.

They will stuff their fish with cotton balls.

They will close the back of the fish with a clothespin. This creates the fish tail.

They can use Elmer's glue to attach the google eyes. These will come off with a lot of playtime. I just hot glued them on later for greater durability.

Kids can decorate their fish. They can use any colors and any patterns. We looked at the pictures in the book and some of the kids tried to copy the fins, scales, etc.

Here are two of the completed fish puppets. The cool part about these puppets is that they actually look like they are swimming through water. When you wiggle the clothespin, the tail of the fish really wiggles about.

To extend the learning, we created a "Story Map" for each story. It was fun for the kids to use the Post-It notes to write down all the different elements of the story. Here is an example of our "Three Little Fish and the Big Bad Shark" story map. After writing, they added their puppets. I have a PVC puppet stage and the kids put on their own version of "The Three Little Fish and the Big Bad Shark". It was fun and hysterical!

Here is the personal story maps that we used. I am sharing this freebie with you. The kids really loved using them and I hope yours will, too! Click here to get your freebie. This freebie is exclusive to my blog :)

Be sure to keep hopping for some other great ideas to keep your buzzing bees busy this summer! Hop over to Kooky Kinders to see her exciting post!

The Crafty Teacher Blog Hop and Giveaway is still going on until July 3rd! Don't miss out on winning one of the hand-crafted items. Plus, each blog has DIY directions posted. Mine is a mini anchor chart stand. I love it! Hop on over!


No comments: