

For this giveaway, everyone wins. Each blogger chose something that spoke to them from Pinterest, or, if they were really ambitious, came up with a brand new idea. Each blogger got their creative juices working and created 2 of the crafts! This is the exciting part. One they get to keep and the other is for the lucky winner of their giveaway!! 1 for Me and 1 For You!
When this blog hop came up, I knew exactly what I wanted to create. I have been wanting a Mini-Anchor Chart Stand for a long time. I love PVC and just needed the extra push to get this started. I tutor kids in my home and while I do have a pocket chart and stand (much to my husband's chagrin), it would be soooo convenient to have a small anchor chart holder right beside me.

I found this amazing Mini-Anchor Chart Stand from Stephanie from Falling Into First. I found the pin on Pinterest here. One look and I was in LOVE! Stephanie is so generous, she went to Lowe's and played around with different sizes, until she was able to create this stand. She shares her dimensions for each of the PVC pipes, as well as detailed instructions on the dimensions of each of the other parts. I took her list to Lowe's along with the photo of each of the pieces. With a little help, I was able to find everything!

I'm going to send you over to Stephanie for the exact dimensions, since she did such an amazing job of creating this! Click here to go straight to the dimensions.
I am going to show you everything else here! I got the PVC pipe from Lowe's, but I must not have looked pathetic enough- they wouldn't cut it for me! That's OK, my husband had a PVC saw and my kids got in on the action. We measured. Everyone helped with this.

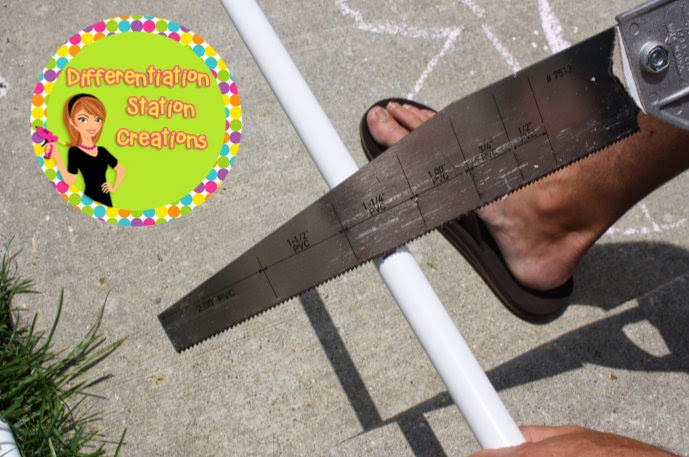
Here is a full set of supplies. Notice, that my PVC is not exactly even. It did not matter with the finished product. It still ended up being level.

I used two different types of tape on these stands. For the first one, I used Duck Tape. It worked, but was really difficult to maneuver. That tape is so powerful, that it attaches immediately and very tight to the PVC. Not great for mistakes! It ended up working after a few tries, but was much more difficult to work with.

Next, I got smart. I made a trip to Target and got this duct tape. It is cheaper and not as strong. Perfect for this project. You can easily move the tape around, if you make a mistake. However, it really attaches, once you have it placed correctly.

You need to leave about 3/4 of an inch of white space at the end of your PVC pipe. That way you are able to push the PVC pipe into the elbow. If you tape all the way to the end, it is really difficult to push into the elbow. I guess you could make this stand without the decorative tape, BUT that is what makes it fun and festive!

Place the tape lightly on the PVC pipe and slowly wrap it around. I had to place two pieces that overlap. If you get some air bubbles, just push on it until it gets flat. You can see that I am starting to push it down in the picture below.

Here you see the two pieces of tape wrapped totally around the PVC and the first elbow attached.

Here is the completed top part of the anchor chart stand.

I wrapped the bottom PVC pipes in the same way and then attached them to the bottom pieces.

Then, I screwed the adapter into the side outlet elbow.

Here is one of the completed mini anchor chart stands. This one is holding my Alphabet Posters with Visual Images of Beginning Sounds. I used two different sized binder rings. If I was putting over 5 anchor charts on my stand, I used 2" diameter binding rings.

If I put less than 5 posters on, I used 1 1/2" binder rings. Below, is the "Super Hero" version!

The Super Hero version was made with Washi Tape. This was the easiest tape to use, but I feel like it is not going to be as durable. The upside is that you can change your tape easily!

Here is the "Polka Dot" version holding my Rainbow Bright Number Posters.

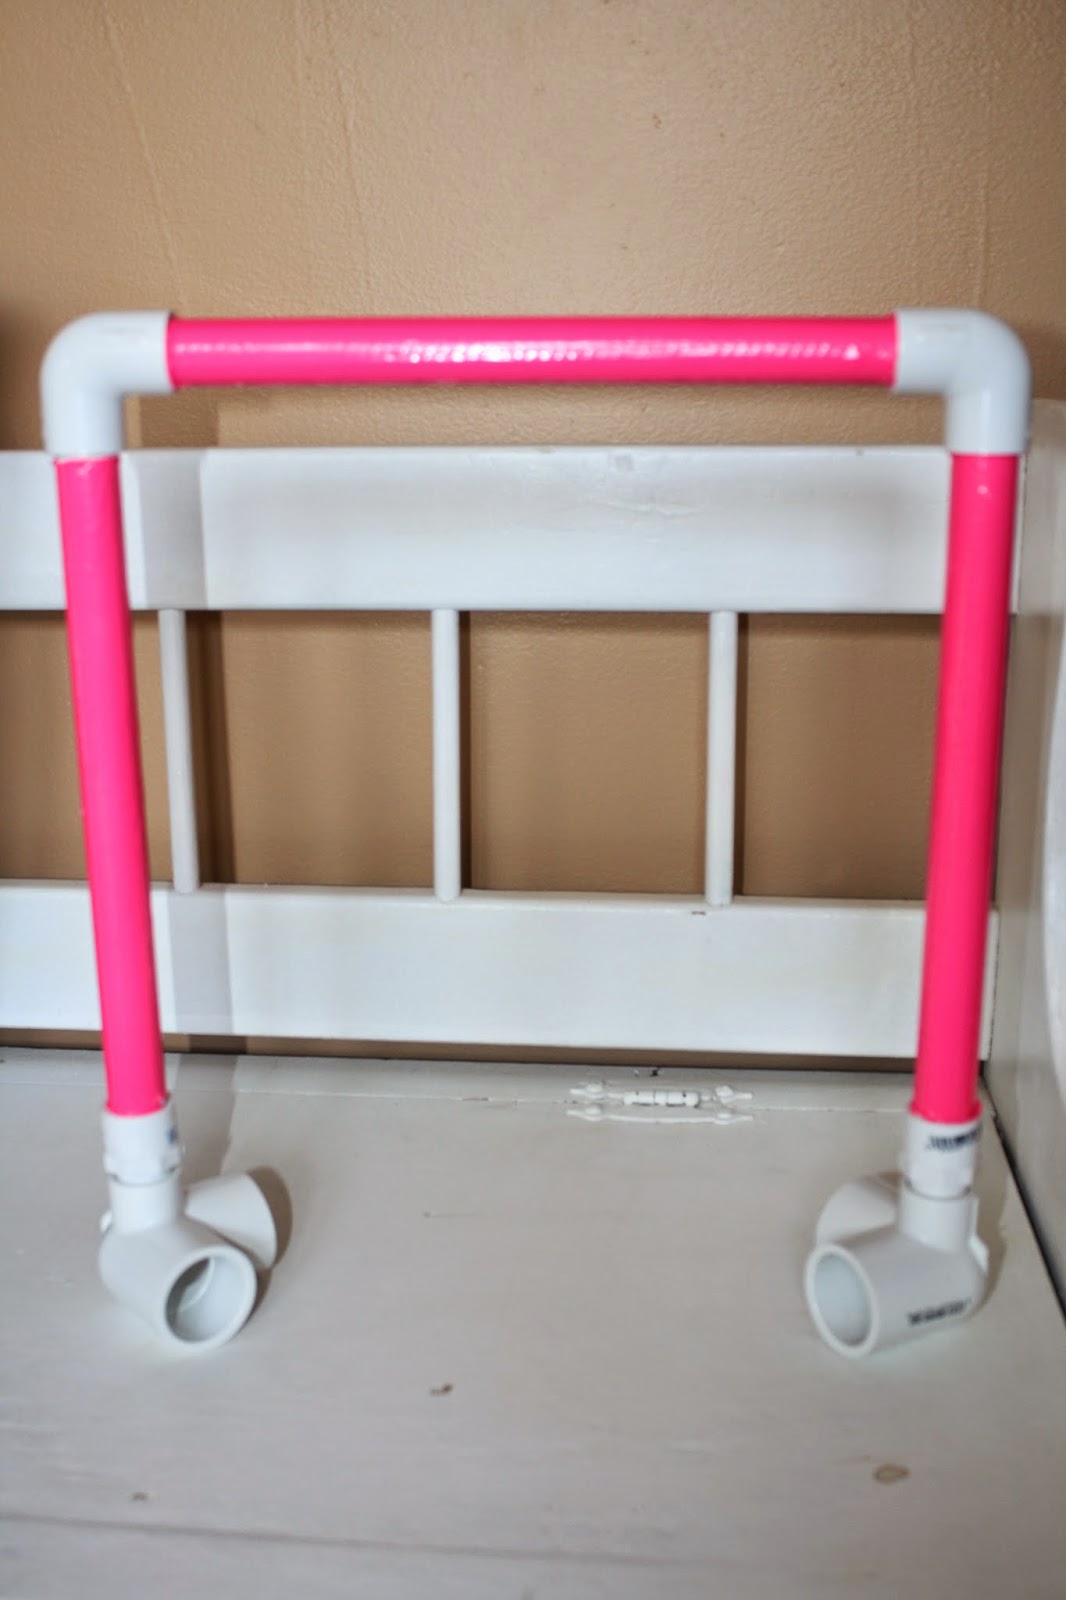
Here is my daughter's favorite! Neon pink!

If you win this giveaway, you can pick your favorite design and I will send it right to you!! The only catch is you must live in the U.S.
Your choices are neon pink, stripes, polka dots, and super hero.


As I cannot enter the competition (being that I live in New Zealand) I just wanted to say good job, love what you produced and thank you for the extra instructions to the original chart stand (which I too have pinned) it will make it even easier to complete :)
ReplyDeleteThanks so much, Angela! It really was very easy to create. I love how they turned out!
DeleteLaura
These are so cute!! I love these!!
ReplyDelete~Kourtney
kourtneypayton83@gmail.com
Mrs. Payton's Precious Kindergarteners
Thanks, Kourtney!
DeleteLaura
LOVE me some POLKA DOTS! :) Fun times! Wendy 1stgradefireworks@gmail.com
ReplyDeleteThat's my favorite, too!!!
DeleteLaura
This is oh so creative!!! Great job!! desireethornton@ymail.com
ReplyDeleteThanks so much! I loved doing it and even more love using it!
DeleteLaura
I love that stand. It is awesome. Was it complicated to put together? Would love to have that in my classroom.
ReplyDeleteIt was very easy to put together. You can probably get the people at Lowes or Home Depot to cut your PVC for you and then it is simply pushing the PVC together. The hardest part is putting on the tape, but even that is pretty easy!
DeleteLaura
What a fun ideas! You did a great job taking photos for this post! I feel like I could go out and make one of these no problem by following your pictures.
ReplyDeleteI'm so glad! I need pictures to follow, so I try my best to document everything. Sometimes I go a little overboard :)
DeleteLaura
This is awesome! I'm so glad you posted such great directions. I definitely need 1 of these for my classroom! :)
ReplyDelete~Melissa
Teacher Treasure Hunter