The Creative Teacher Giveaway is back! This is my favorite type of giveaway, because you get to see some serious creativity at work AND get a chance to win the amazing creations! I love these hops, because I get to see other teacher's putting their creativity to work. I always finish the hop with so many new ideas and am supercharged with motivation!
This time around I wanted to share a DIY tutorial on how to make Pringles Can FIVES!
The whole inspiration for this project was a wonderful post from the blog
"How
Long Is This Hall?" She used a Pringles can, some plastic frogs, and Velcro
to create this magnificent manipulative!!!
Please check out her frogs!
They are adorable.
I fell in love with the idea of using a Pringles Can with plastic animals, because it is fun and so practical. The beauty of this manipulative is that you can so easily demonstrate addition and subtraction. The animals "go away" by putting them inside the container. You can "add" animals by pulling them out and attaching them to the Velcro. Such a great visual and physical example of adding and subtracting.
An extra bonus is that all the manipulatives can be stored in the can after you are done using them!
Here are DIY directions, so you can make your own Pringles can manipulatives.
Materials:
Pringles can
Scrapbook paper or Construction Paper
Plastic Finger Puppets or Plastic Animals
Cotton Balls
Velcro
Hot Glue
Super Glue
Clear Packing Tape
I start out by selecting the animals that I would like to use. Click on the animals to see all the fun that I have already created:
sharks,
This time I wanted to work with monkeys! You can use monkeys for so many things in the preschool and kindergarten classroom. There are the "5 Little Monkey's Jumping On The Bed", "5 Little Monkeys Sitting In A Tree", and all the "Five Little Monkey" books, by Eileen Christelow.
You can get Eileen Christelow's books from these affiliate links:
I started by getting my Pringles can and laminating a piece of "jungle looking" scrapbook paper. I cut the paper to fit the can and hot glued it to the outside of the can. To hot glue evenly, start with a very small area of paper and work your way around.
Once you get the paper glued to the can, take a piece of packing tape and place it on the overlapping piece to create a tight seal. Your can is ready!
Next, you are going to use super glue to attach the Velcro to the can. I always attach the soft Velcro to the can. I use super glue, because the hot glue tends to pull off with extended use. Make sure to hold down the Velcro for at least 30 seconds.
Now, you can work on your monkeys. I bought plastic finger puppets from Oriental Trading. They were pretty cheap and easy to get.
To make the finger puppet into a manipulative, stuff cotton balls inside the finger puppet. I usually end up putting two or three. This will make the puppet into a solid monkey.
After pushing the cotton balls in as hard as you can, you are ready to create a seal with hot glue. The cotton ball should be a little below the lip of plastic. You will apply hot glue all over the top of the cotton ball. Be sure to cover the entire cotton ball and overlap on top of the plastic lip. Don't be stingy with your hot glue!!
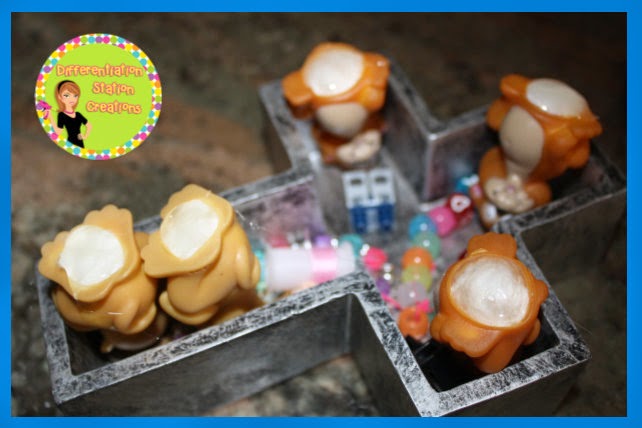
Then, I usually attach the Velcro to the hot glue after it has dried a little bit. You want the Velcro to smoosh into the hot glue and really attach.
You will then prop the monkeys up to dry. Make sure that the monkeys are pretty level, so that the hot glue dries evenly.
Here are the monkeys sitting on the Velcro!
Here are the affiliate links that I used for my finger puppet manipulatives!
A few qualifiers for the giveaway: The winner must be a classroom or homeschool teacher. The winner must live in the contiguous US (because of shipping). The winner must contact me within 3 days with your mailing information. I will also be verifying all entries. Thanks so much for entering the giveaway!

a Rafflecopter giveaway
Thanks so much for joining me! I would love to hear about your feedback and ideas for more creations! Would love to hear from you!
 How much will you do in the name of exercise??