Saturday, September 13, 2014

Trashy Crafter Giveaway!

I am so excited to share an amazing talent with you today!  I am so privileged to be teaming up with Kimberly, the founder of Trashy Crafter.  When I was asked to do a review of one of her bracelets, I was head over heels!!
Trashy Crafter is an amazing venture created by Kimberly and her mom.  Her story is very close to my heart.  I am lucky enough to be able to work side by side with my mom.  This is a dream come true, because my mom inspires me.  She is a retired guidance counselor with an amazing ability to connect with kids.  In the last few years, I was able to present at preschool conferences with my mom and collaborate on educational resources with a guidance twist.

This is what initially drew me to Kimberly.  We share that special bond with our moms and are able to actually create with them!  Here is Kimberly's story:
I love that Kimberly and her mom are "saving" damaged books and transforming them into beautiful jewelry.  I LOVE books! As teachers and parents, books are precious to us.  Kimberly and her mom make it possible for us to bring books into another area of our lives.  We are able to wear our favorite books, as beautiful jewelry!

I chose a set of bracelets made from "If You Give A Mouse A Cookie", by Laura Numeroff.  This is an absolute favorite of my children.  I have so many happy memories of reading this book with them. 
When the package came from Kimberly, I was thrilled!  Not only does she recycle the books, she recycles the packaging for her bracelets!  Adorable and earth friendly :)
Here I am, opening my treasure!
It was everything I hoped for and MORE!
The homemade beads are beautiful and are paired with one of a kind beads.  The bracelets are perfect!
The bracelets are cheery and whimsical, just like the book.
Since my kids were the inspiration for choosing the bracelets, they had to get in on the fun!
 They each wanted to model the bracelets for the blog.  I'm positive that I will have to share these bracelets with my daughter!
Now I get to share some of Kimberly's talent with you!  You can enter the Rafflecopter below for a chance to win a pair of earrings from her store!
You can find Kimberly in so many places:
A huge thanks, to Kimberly and her mom, for introducing me to their fabulous jewelry!  I am already starting to think about the jewelry I can give to special teachers!  Enter the rafflecopter for your chance to own some of Kimberly's fabulous jewelry!

Follow on Bloglovin
a Rafflecopter giveaway

Saturday, September 6, 2014

Hands On Activities to Explore Space

Space is irresistible to many children.  The idea of a place that is just out of reach and alien to our way of life here is fascinating.  Imagine a place where you float, instead of walk.  Where stars shine bright and they can explore places where no one has ever been before.  This is a world of wonder for many children and adults.  Bring concepts of space to life with hands-on activities and props.  Allow children to use their imaginations to explore beyond the boundaries of our world!
One of the most engaging ideas of space, for my children, is the idea that people would float or fly.  Rockets and space ships are engaging and fun!  We created a "Rocket Blaster Pack" out of Pringles cans.  This can be used for dramatic play, or for gearing up as your astronauts set out on their own missions!  It was easy to create and is sure to be a favorite of your space explorers.  You can get the DIY directions here.
Keeping with the space travel theme, I love the idea of using the rocket ship for different activities.  I found an awesome post at Mrs. Karen's Presschool Ideas.  She has fabulous ideas for a space unit and you should definitely check them out!  I loved her rocket ship names and decided we needed to make our own!

These are very easy to differentiate.  For this child, I cut out the shapes and wrote the letters for the name.  He traced the letters and glued them on the page.
 This child wrote her own name, and cut out some of the shapes.  All the glue and glitter was done independently.  Notice the glitter that literally coats the table :)
 This child cut out squares that were traced onto the paper and completed the rest of the task independently. 
You can provide as little or as much support as needed.  We moved onto patterns, after names.  You can use any pattern: AB, AAB, AABB, ABB.  We used an AB pattern and the kids had a great time selecting the colors for their patterns.  
You can differentiate by:
-  Create the pattern on a model and have children glue the same colors on top of your pattern.
-  Give the child the exact number of specific colors to create the pattern and provide a model.
-  Give the child the exact number of specific colors with no model.
 -  Provide children with a rainbow of colors and let them create their own pattern.
The last set of rockets that we built was focused on counting.  Students would build the rocket ship with the same number of squares as the numeral on the top.  Students count and glue.  You could provide a model for students to use for a reference, or to glue right on top of the model.
Here are some of our rocket creations!  I love that you can use the same concept in so many different ways.  The kids were engaged with every project.
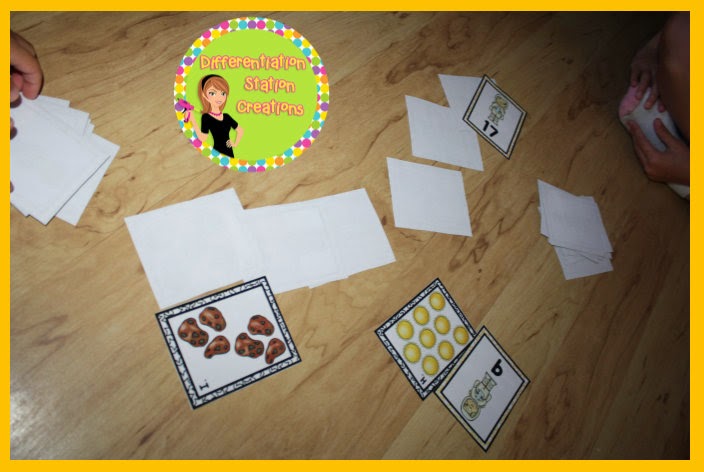
I have a space write the room activity for the alphabet and for numbers to 20.  It gets kids up and moving around the room, while practicing key skills in a fun, thematic way.


You can click on the pictures to purchase the packs!

Both the alphabet and math pack have differentiated recording sheets.

When children are searching the room for the numbers 0-20, they can record their findings in three different ways.

They can count and record the numeral,
 record with tally marks,
or record by drawing circles in a ten frame(s).
Students can use a pencil or crayon, but I found that the little bingo dabbers worked perfectly and were so much more fun!  These bingo dabbers were from the dollar store.

We also used the cards from the pack to play memory,
BAM! (this is just War with a space themed name).  Great for working on greater and less than.
 Here the kids got the same amount, so they had to use cards to spell out BAM!
I have one more really fun way to explore space and math concepts.  This past year, I found the great song "Five Little Men in A Flying Saucer".  It is a great song that teaches 'left' and 'right' and subtraction.  Here is a version of it from Twinkl Primary Resources.
I created my own manipulative out of plastic plates and Little People, so that my kids could explore subtraction in a hands-on way.  We listened to the song and acted out the story with the "Little Men".  Get the DIY directions for the manipulative here.
Hope you found some great ideas to use with your space exploration!  I would love to hear your ideas for playing in space!
Follow on Bloglovin
I am linking up with Comprehension Connection for a Thematic Thursday linky!


Follow on Bloglovin

Thursday, September 4, 2014

DIY Rocket Blaster Jet Pack

Create your own Rocket Blaster Jet Pack!  Great for play at home, dramatic play areas, and for all your budding astronauts!
Follow simple instructions to build your own rocket blaster jet pack!
 
You need:
2 Pringles cans
Aluminum foil
Tape
Hot glue/ Hot glue gun
Ribbon or Duct tape
Streamers/Tissue paper/or Felt

Cut aluminum foil large enough to cover each Pringles can.  Tape the inside end to the Pringles can.  Hot glue the aluminum foil to the can.
Place one piece of tape down the edge of the aluminum foil to keep it from peeling off.
 Fold the extra aluminum foil over one end of the pringles can.  I fold it over the plastic top, so that I can hot glue the jet pack "fire" (streamers) to the metal can.

Create two aluminum Pringles cans.
Hot glue the two cans together.  Hold them firmly for a minute, after hot gluing the cans together.
Use ribbon or duct tape to strengthen the attachment of the two cans.  I used decorative ribbon and hot glued it right to the cans.  I attached the ribbon on the top and bottom.  
It would be even easier to use duct tape to hold the two cans together.  You can also use decorative duck tape.
To create straps, I used ribbon.  The ribbon was about 3-4 inches wide.  I hot glued the ribbon to the back of the jet pack.  I hot glued at the top and bottom of the pack.
To create the fire, I hot glued strips of tissue paper to the bottom of each Pringles can.  I used red, yellow and orange to look like fire.  However, just use whatever colors your children love!
To create a more durable fire, you could use felt or fabric.  This would allow kids to be more rough and tumble with their jet packs.  You would cut the fabric or felt into strips and hot glue to the bottom.  Make sure to use thin strips, if you are using fabric or felt.  This will allow the fire to billow around, as the kids move.
Here is the completed jet pack!  Ready to blast right into space!
Hope you enjoyed the directions and that your kids love rocketing around the solar system!

Follow on Bloglovin

"Proud to Be Primary" Giveaway


There are 5 awesome prizes packs for 5 people to win! 
The total value of all prize packs is $250!! 
Prizes consist of Teachers Pay Teachers gift certificates, a bracelet, gift certificates to Proud to be Primary's store, as well as $10 and $5 Winner's Choice certificates to many wonderful TpT stores...myself included! (Images below show you what you could win)


You can enter the 'Proud to be 1000...on TpT' Giveaway NOW for 5 days ONLY (September 1st - 5th). Enter the Rafflecopter below for your chance to win!

a Rafflecopter giveaway

Follow on Bloglovin

Pin It